Search This Blog

Thursday, November 25, 2010

Let us try this all again...

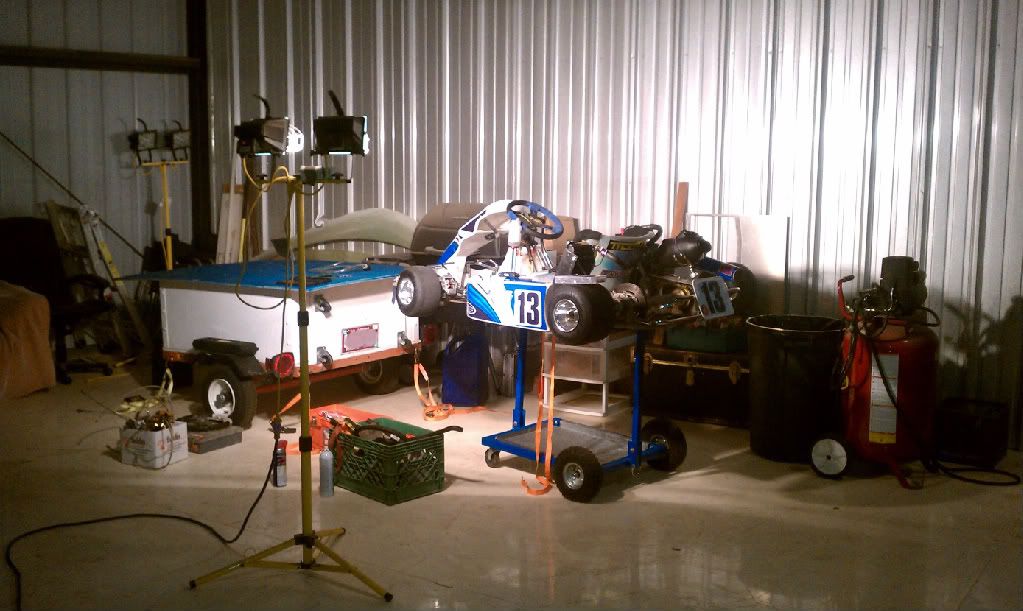
New place to work on the kart. The added space is very nice to have, and it is much closer to the track.


The rear brakes had helicoils inserted by a friend from work. Buying him lunch to do it for me was a much better option than spending the $50-$100 to buy the inserting tools to do the job right. In addition to the fact that I do not have a drill press to ensure the new drill hole was straight. Normally I would take the 'close enough' approach like I discussed in a previous post, but these are my brakes. So below is just an example of what an inserted helicoil looks like since I forgot to take a picture before installing them on the kart.


New O-rings:

With those new threads inserted I also decided it was time to upgrade the sealing o-rings again. You might recall that after I first drove the kart I had replaced all of the o-rings in the brake system. While the old o-rings got the job done, they were very soft and would often fail from me over-tightening them. In the world of seals soft is usually a very good feature to have, since the soft material will deform better to the surface it is being pushed up against.
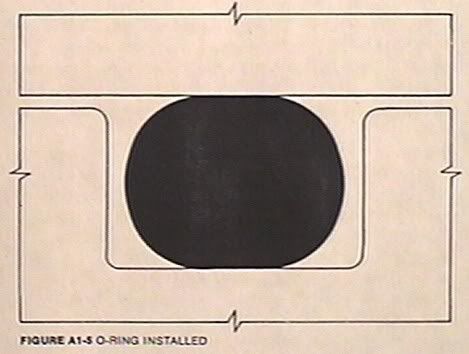
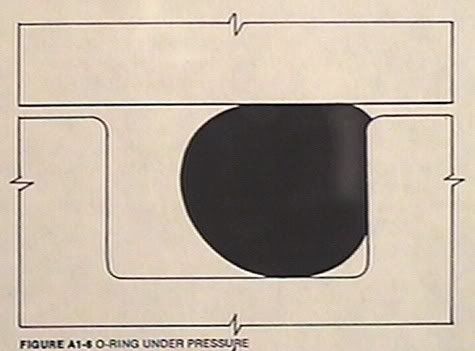
After installation and while not in use
Under normal operating conditions
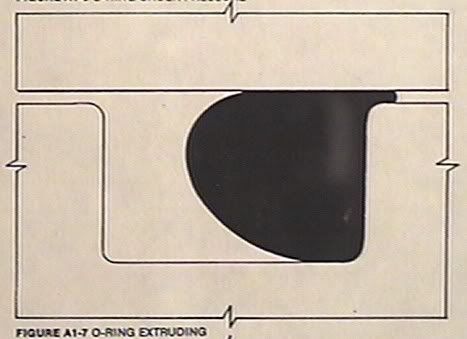
O-ring yielding
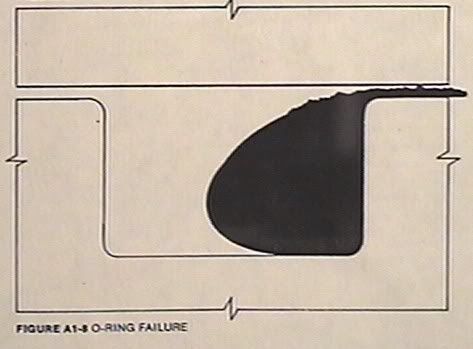
O-ring failure

While the above pictures don't show exactly how my o-rings might fail, it is pretty close. I decided to go with a harder material o-ring simply such that the chances of me over-tightening the bleeder screw and causing the o-ring to fail are much less likely. This might seem like a silly problem to have since the idea of over-tightening seems like one that could easily be avoided; so, I'm going to elaborate on what the problem is exactly.

The bleeder nuts are small nuts (4mm) that I have to remove to let small air bubbles out of the brakes. I have to do this almost every time I go racing. Air bubbles in the brakes mean the brakes will basically not work. The fluid in the brake system will experience upwards of 1000-2000 pound of pressure per square inch (psi) when I really push on the brakes, and the seal needs to be able to hold this force back. That means when I put these nuts back in, they need to be tight enough to ensure the seal is adequate as well as simply not fall out while racing (every part of these karts vibrate so much that nuts will often come loose). So what is too tight? Well if you recall the last time you put the cap back on bottle of soda (back on, not take off) that finger tight feeling you recall would be TOO tight and fail the o-ring. So I hope this makes you understand the dilemma I felt with these old o-rings. "2000psi" versus "looser than a bottle cap" versus "falling out".

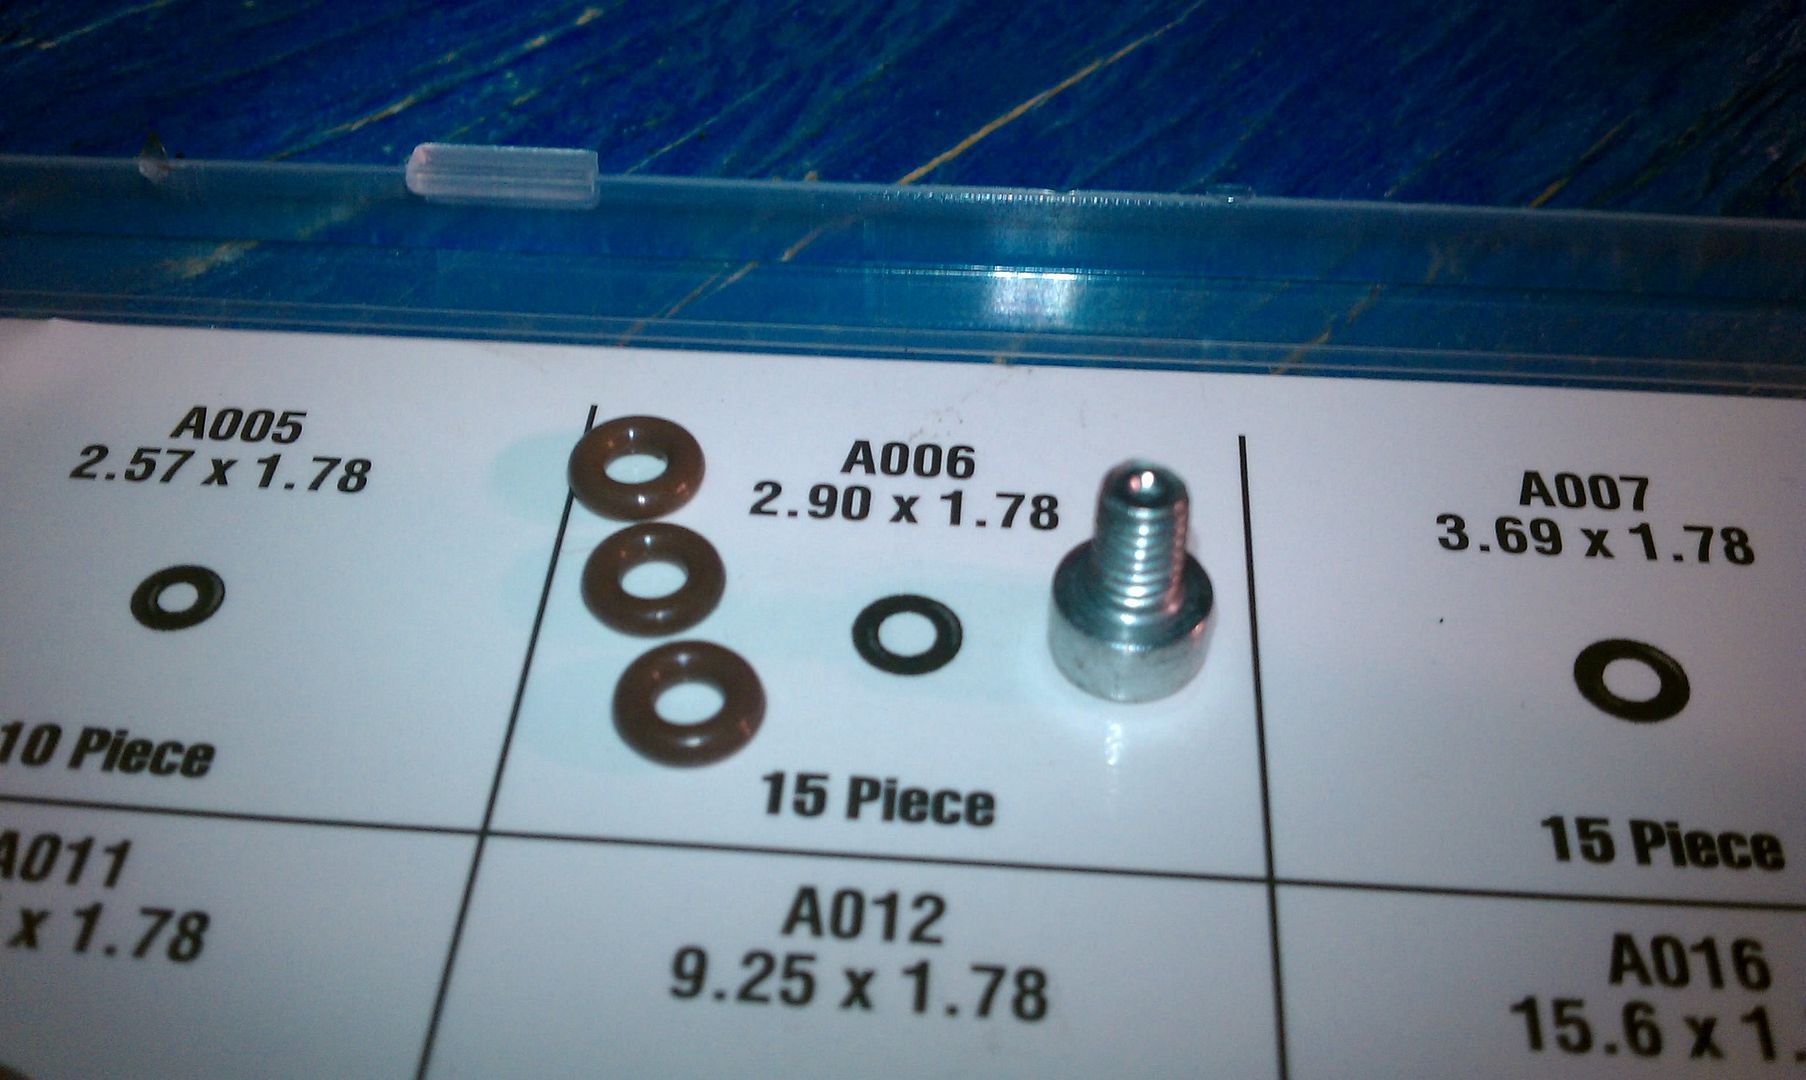
However, with the new o-rings, I am able to exert a lot more force on the nut (a little tighter than a bottle cap now) and form a good seal. The new o-rings are a material called Viton and are pictured below. They are also much more durable. I sense that this is boring to most people, but the next time you push on your brakes really hard (or at all) imagine if they decided to stop working right then. Now stop from 100 mph in less than 100ft.
The only concern I have now, is that since I am torquing these nuts a little more than before, that I might strip the threads out of the front brakes now. If that does happen, I'll have to helicoil all of the brakes, at which point I am sure they will be more than adequate in strength. The calipers are all made of a cast aluminum which is surprisingly soft. The steel helicoil inserts can take a greater load and distribute that load over a greater area on the caliper. The front brakes failing does not concern me as much as the rear brakes, since they are more of a supplemental braking system, rather than the main. It has also already happened to me once before and I fared well. Just over heated my rear brakes a little.


Track night #3

The kart runs pretty well now. The motor delivers smooth and continuous power. There were some small modifications done at the track again. But I'll discuss technical details in the next post. For now I simply share a list of things to fix, and videos....


List of 9 items to fix:
1) Fix the radiator mounting
2) FIX THE RADIATOR MOUNTING
2) Get the front-end alignment back to near zero
3) Mount fuel pump behind seat, not right under the exhaust port
4) Provide proper vent and fuel return lines
5) Steering wheel
6) Ream out the channels on the shifting rod so that it doesn't jiggle so loosely
7) Repair radiator hose
8) Reposition the seat to actually even out the weight distribution. (57% on the back is the goal)
9) New radiator cap


Here's Ken, the guy always with me at the track, taking out an 80cc for a spin. I've got a lot to learn.


Friday, November 5, 2010

A Delay

I always find it hilarious when groups criticize the efforts of others. Especially when it comes to safety. In general I believe that some people are cautious enough, and the rest are just paranoid to the point of 'death by boredom'. South Park recently made a great episode about the BP oil spill, in which they introduced the new character "Captain Hindsight." This character was to illustrate the media's typical hindsight 'clairvoyant' attitude when commenting on how such tragedies 'could have been prevented.'


However, the successfully prevented tragedies typically take a back-seat, since (it would seem) rating are higher when people can sit in the comfortable couch of 'obviously that was a bad idea'.

So, it would appear, in a subsequent effort lower my own ratings; I am going to educate my readers in the importance of 'double checking' and thus 'obvious safety'. I am going to tell you exactly why I did not go racing this past Tuesday (2 Nov 2010).


The Rebuild

Well this is rather embarrassing. It seems I was learning so much while replacing the head-gasket and inspecting three dozen other systems, that I forgot to take a single picture of the event itself.

I took my kart to a friend's house where he and his brother gave my kart a proper inspection. These guys have been rebuilding cars and racing karts since they were wee-little-guys. They have rebuilt more than 50 classic cars and currently has 12 completely rebuilt motors sitting in the corner as well at 7 ready to work on cars and trucks. Their attitude of 'good enough' allowed for some quick progress to be made and many short-cuts taken. I am sure that at some point the effects of this 90% approach might make themselves apparent, but my driving skills are hardly to the point that it would make any sort of difference. In fact, mathematically, I believe the difference it will/would make are on the order of 0.5% difference to my racing abilities. So by the time I actually will need to even think about those last 10%, I'll need to rebuild the motor anyways.

So what did we do?

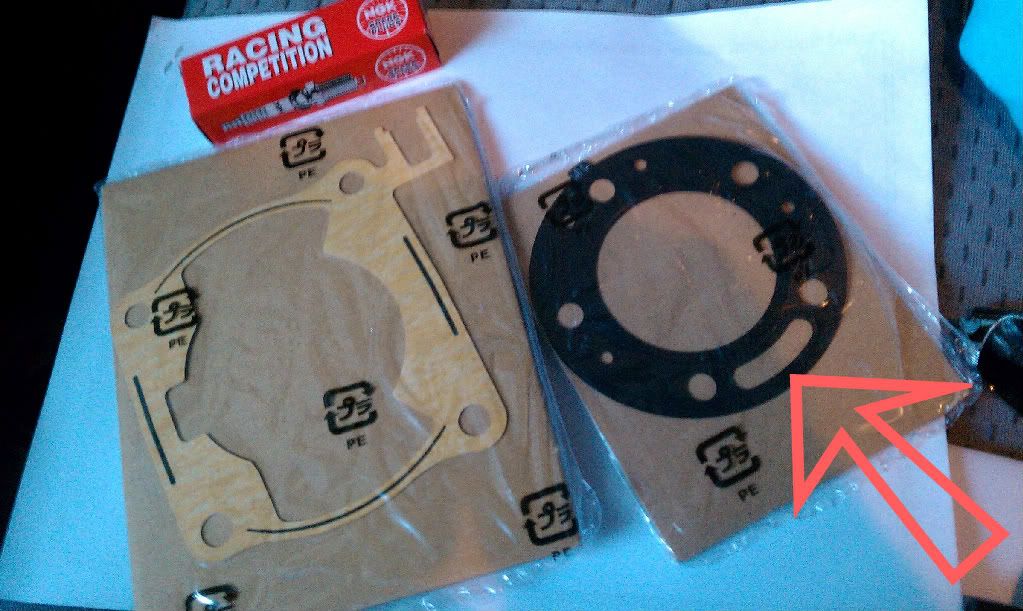
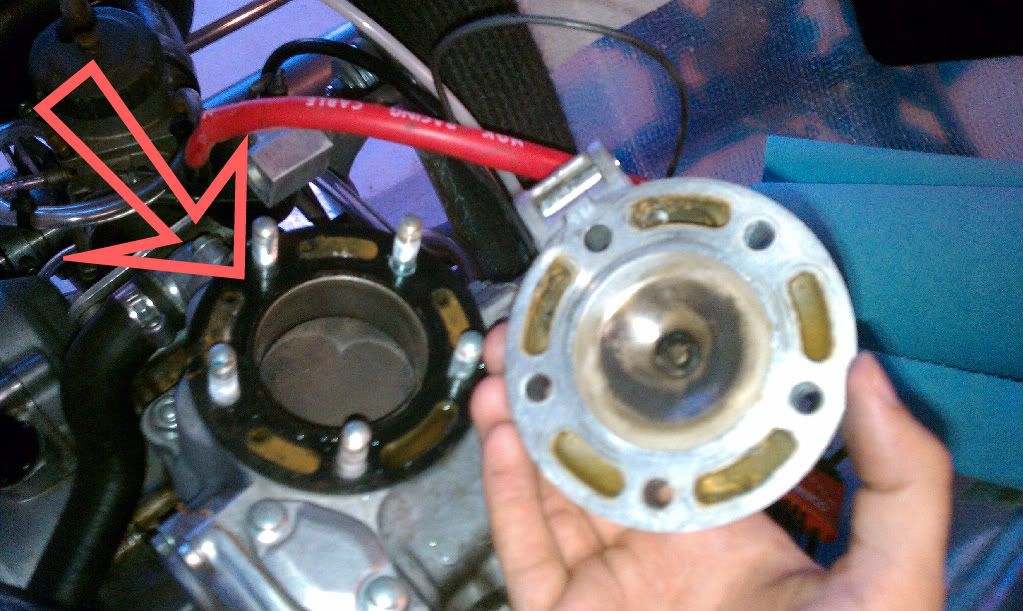
Took the parts pictured below, and inserted them into the parts pictured even more below. The part that I replaced was the head-gasket, which was indeed leaking. Slap some silicon grease on that baby (this is the 90% part) and the seal was good to go. Hurray, two problems solved with only one part replaced! After doing a quick test drive around the neighborhood, the ridiculous speed and smooth power suggested that all was well. Oh and finally a new spark plug (didn't index it, oh well).

A thank you to the guy (there's only one) at Innovative Karting for always being helpful as well.


Only problem remaining, brakes were botched again! The end of the road comes up on you rather quickly when you stomp on the brake pedal and it feels as though the kart is saying, "Can I help you with something?" No matter, I did not run off the road, but there was indeed nothing wrong with the brakes. They simply required some shims.

Shimming your brakes is a normal part of karting. Since these karts are so small, the brake system is kept simple and light. The consequence is that the brake pads only have a very limited distance they can travel before the entire system is 'out' of fluid. So as the pads get worn down (over the course of many races) the pads get thinner and thus they can not push hard on the brake rotors anymore. So to fix the problem drivers will put small plates of metal behind the brake pads to push them farther out and regain the braking power needed to stop these karts on a dime. It sounds like something that could be improved on, and it has been, but the new system costs money ($400) that I don't really need to spend since shimming the brakes is easy. Just to be sure the brakes were fine, my friends and I bled the brakes twice just to make sure there was no air bubbles (refer to an earlier post if you are not familiar with bleeding the brakes). As far as I'm concerned, this mustang is ready to roll!


So what's the delay?

A stitch, in time, saves nine. So what, this is racing, not knitting. Well I have only gone racing twice (almost three times), but I've always doubled checked my kart the night before. I look over every nut, bolt, lock-wire, etc. It is really boring.

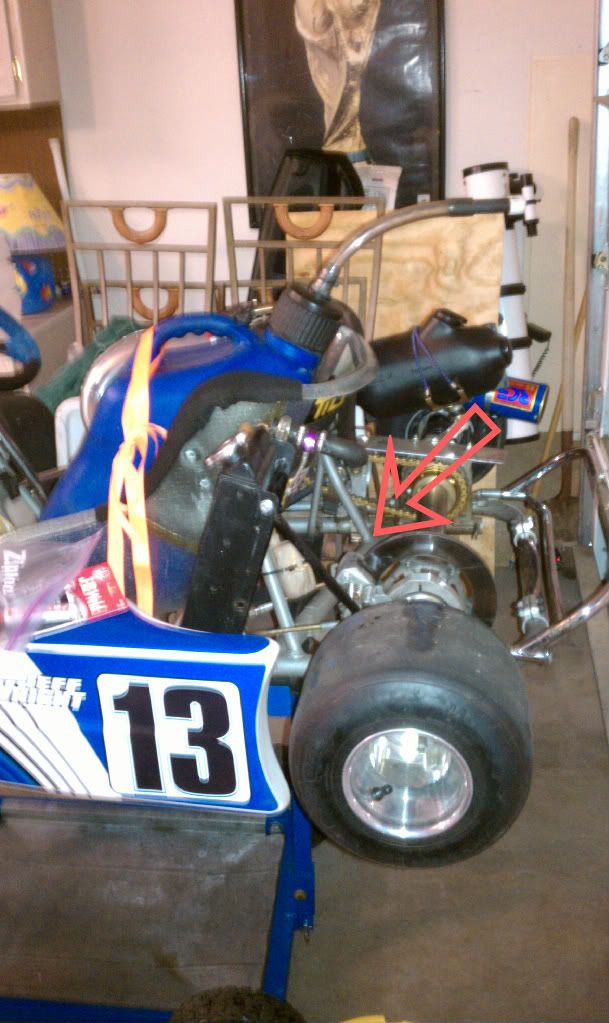
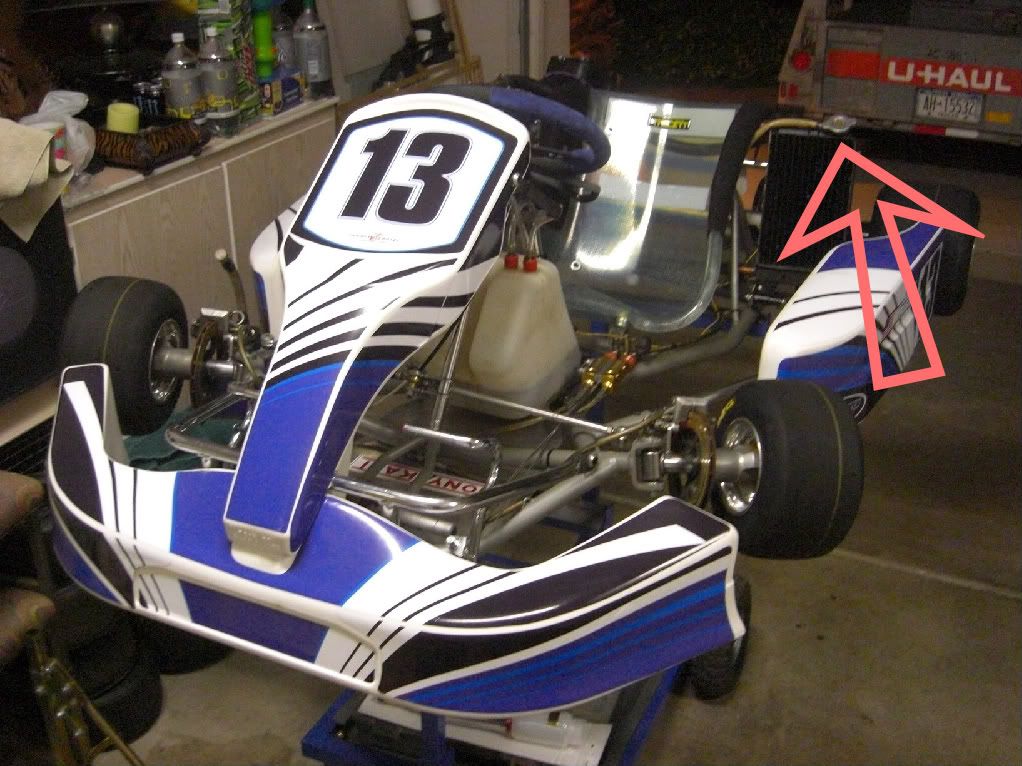
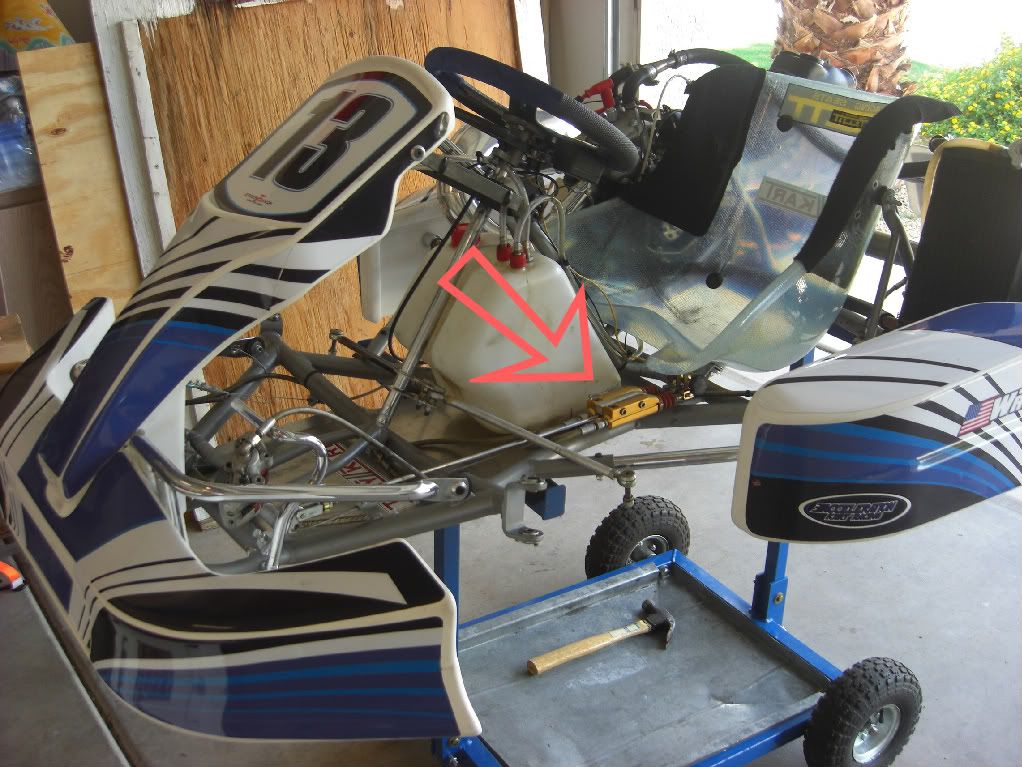
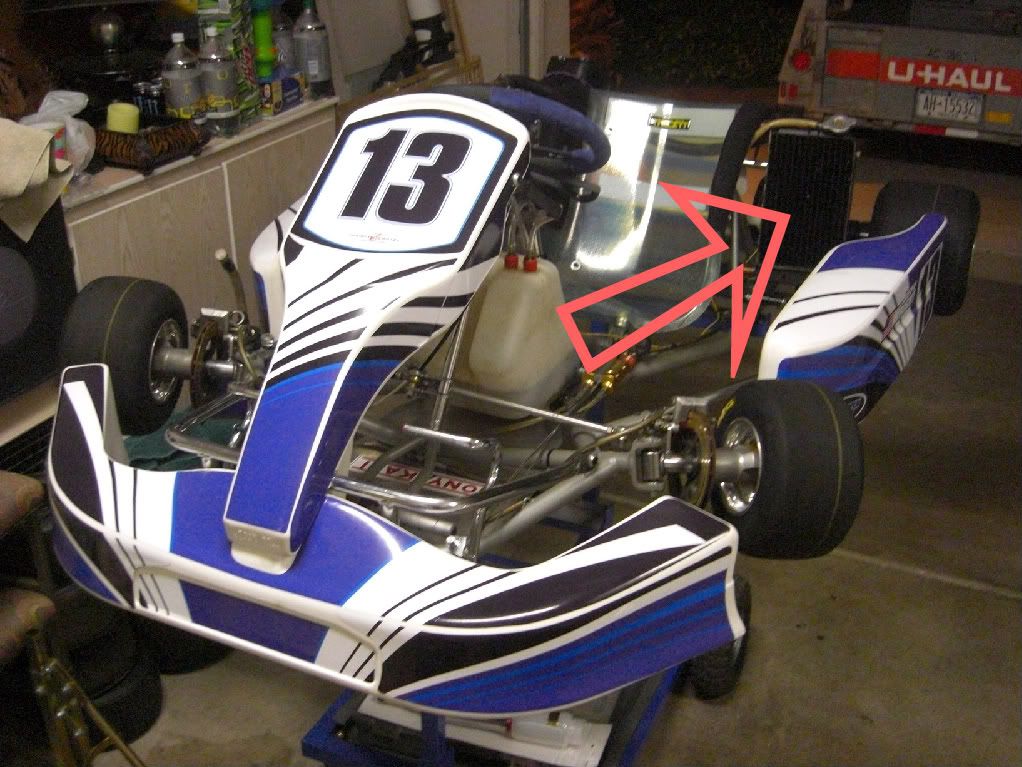
So I bleed the front brakes and then bleed the back brakes, as always. Here is a picture of where the rear brake caliper is (right behind the seat)


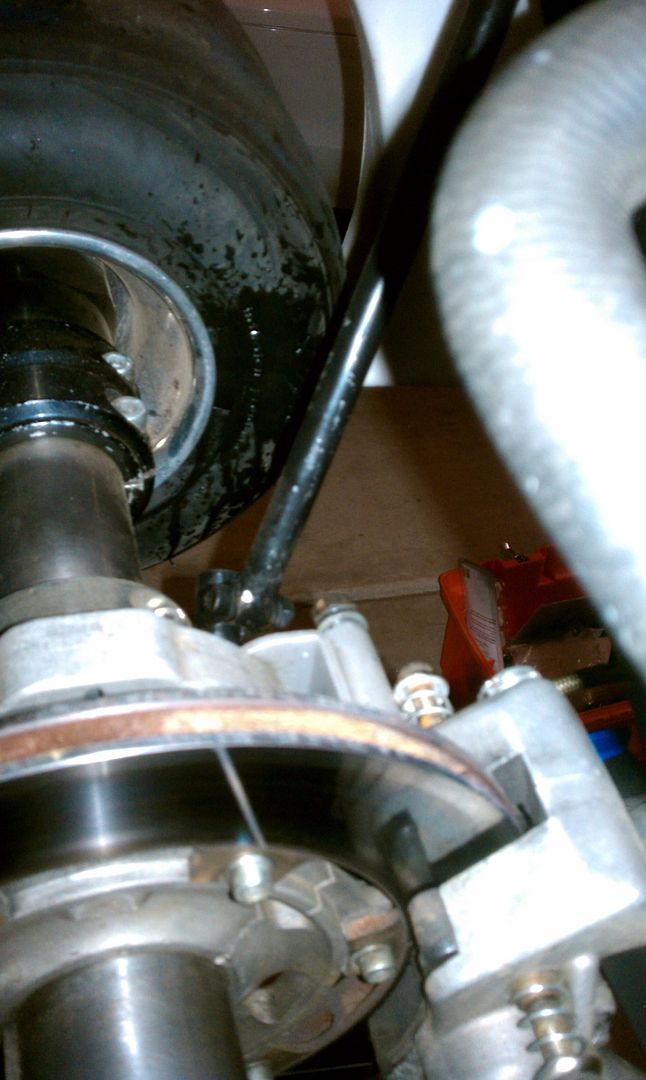
And what do I notice? The bleeder nut on the rear brake (basically the main brake) doesn't really want to tighten. So I think, "oh no, I know what is going to happen when I test this." Sure enough I pull the brake pedal with my hand and...


That giant wet spot on the tire in the picture above is brake fluid that shot out of the rear brake caliper. I don't assume everyone reading this is mechanically inclined, so I'll go ahead and point out that this is a very bad thing. The bleeder nut shot out of the caliper and took all of the threads with it. If I had not does this night before check, this probably would have happened the next time I tried to stop really hard, which would likely be at the end of the straight-away at 80mph. So I am glad that I have formed this habit very early. So I will need to do a little bit of work to repair this new problem now.


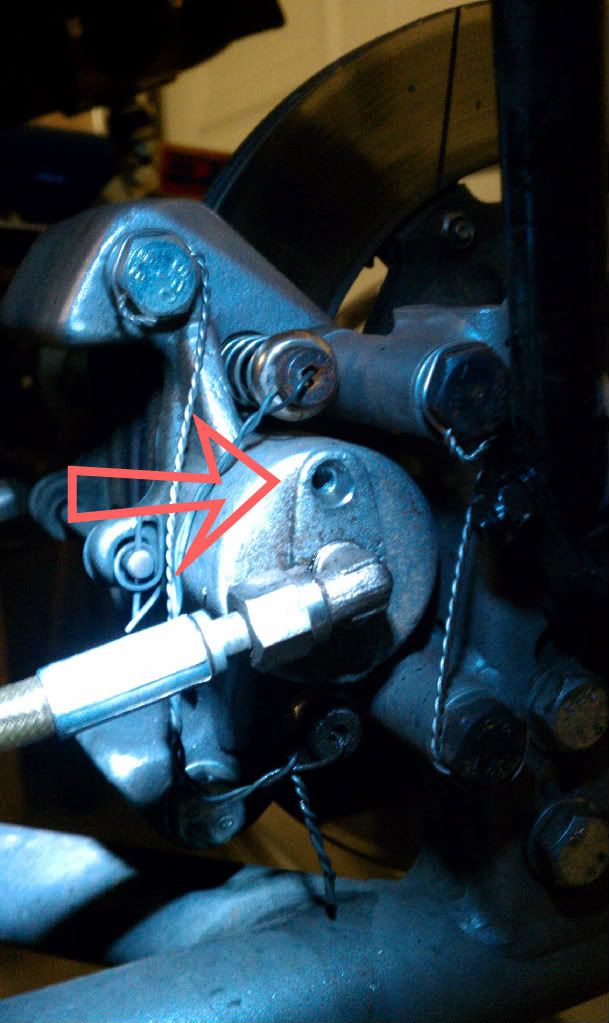
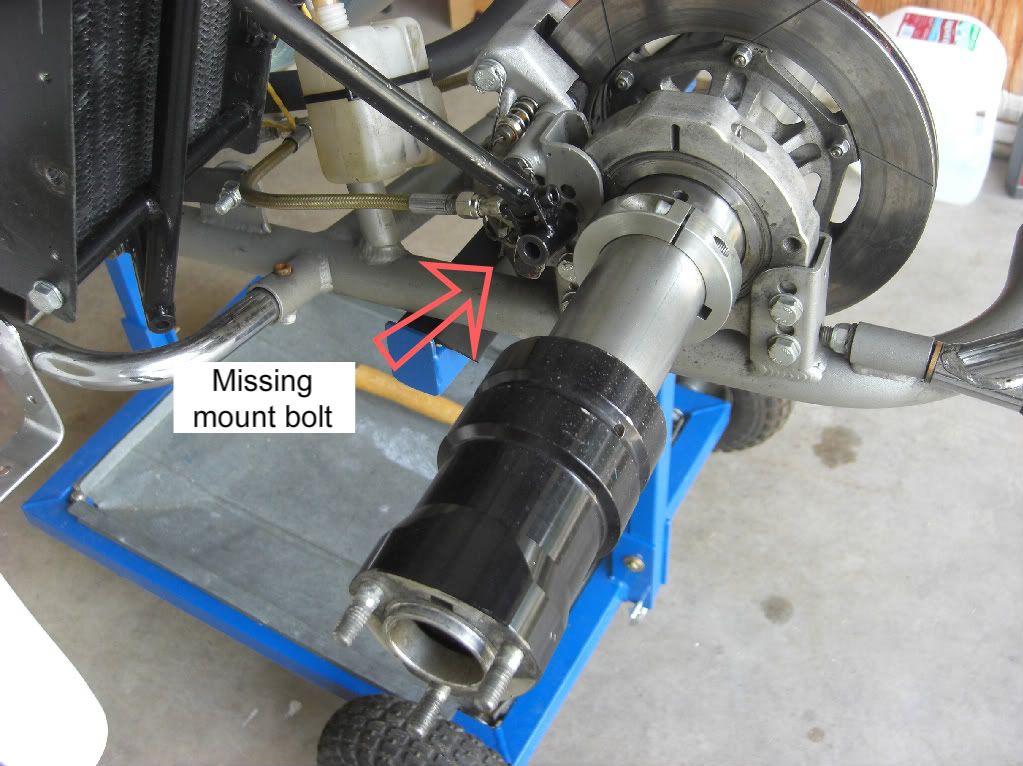
Pictured above is the caliper and the arrow is pointing to where the bleeder valve fired out of and took all of the threads with it. You'll notice the hole in there is smooth, it should be ribbed with threads.

So I am glad that I did this night before check. It won't end up in the paper that I prevented my own tragedy, but what you won't see in the paper on yesterday's overly dramatic new paper:

"A 28 year-old male is hospitalized after he exploded off the end of the straight-away at PKRA doing more than 500 mile per hour in his 'go-kart' because of a 'brake system failure'. Authorities say video games are to blame. All fun is banned from human existence. Next up, the world figuratively 'holds its breath' as China and Russia take-turns holding a blue-ribbon in the Everyone-is-a-Winner Olympic Etch-a-Sketch finals"


So until next time, I'll be fixing the kart some more.

-S


Wednesday, October 27, 2010

CR125 Rework

So with the spark plug theory only being partially correct it would seem that hunting down the real cause of my horrid engine performance is back in the spotlight.

Then what is it? Well after noticing that I lose about 50% of my cooling fluid in 10 minutes of racing, evidence would point to a couple of possibilities. This "water loss" was found to be coming out of the over-pressure blow off valve (that is what the cap on your car's radiator is for).


So the possible theories are as follows....

1) Over heating causes the rapid water loss, and the poor motor sputtering is something else

2) The water loss is due to a faulty radiator cap (spring loaded mechanism), and the poor performance is due to over-heating/detonation due to over-heating

3) Leaking head-gasket is allowing water to enter the cylinder
3b) Leaking head-gasket is allowing high pressure gases to enter cooling system and causing over pressure blow off. Loss of pressure in power stroke (ever stroke for a 2-cycle) leads to poor and unreliable engine performance


As you can see by the detail I put into 3b, I hope it is 3b. Since I could solve two known problems in one 'go'. So why does this seem like the most likely candidate to me? Well if the piston is pushing this compressed gas into the cooling system, the motor is going to lose some power (observable one), it will definitely cause an over pressure in the cooling system and cause a leak (observable two), and since we determined that the water was exiting from the blow off valve (observable three). Thus, the leaking head-gasket theory would match the available evidence. Since water entering into the chamber wouldn't account for why we found the over-flow can full over water when we emptied it right before a test run. However, the pictures below would suggest that this does indeed happen. So perhaps it occasionally does happen in combination with the above theory. Both would require a leaking head-gasket.

That being said please bear in mind that the final solution could be a combination of any/all of these.
I'm going to replace the radiator cap, since that is a common part to replace and this one is old and crappy regardless.

Now time for lots and lots of pictures:


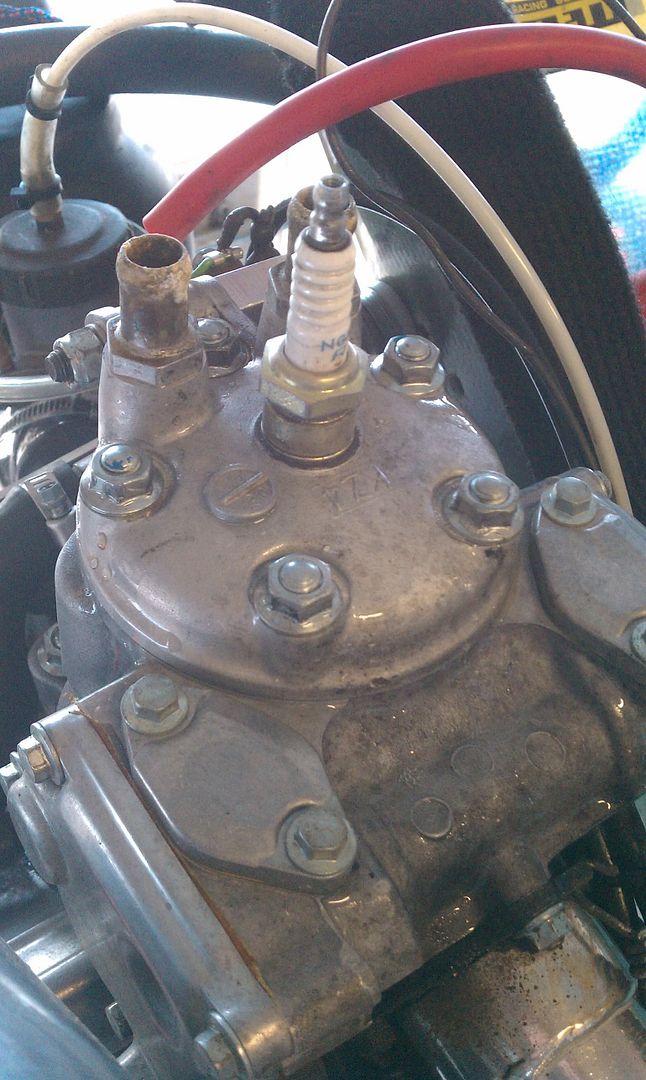
The motor with the hoses removed from the cooling tubes and the spark plug wire removed
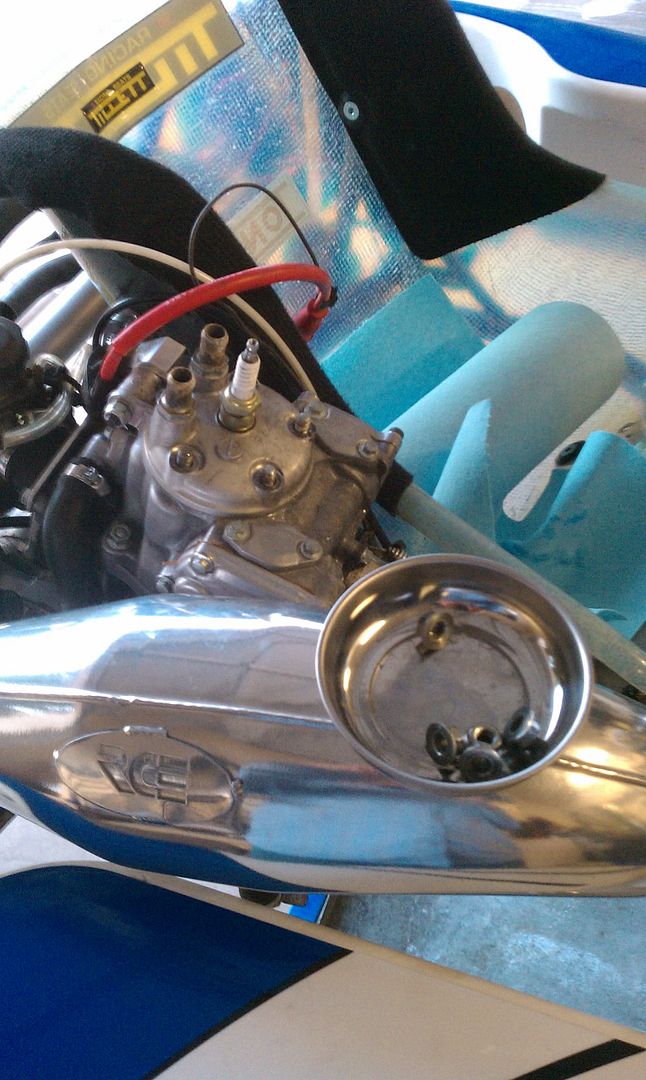
Nuts removed and stored
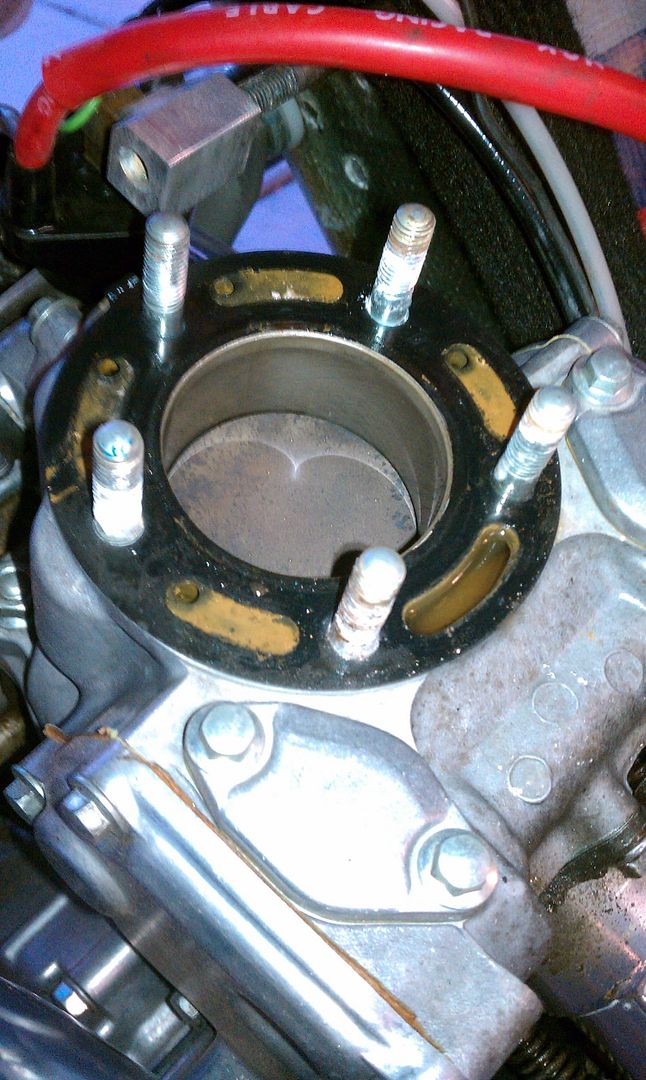
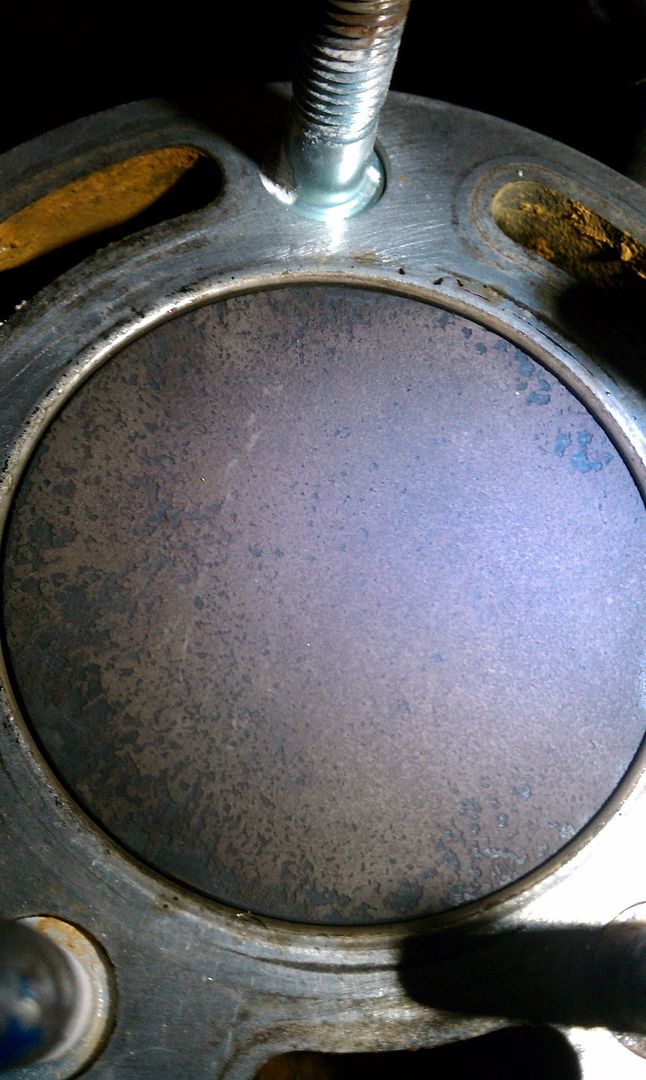
Head removed and a view of the head-gasket (black), the studs (bolts), cooling ducts (brown), and piston (black in center)
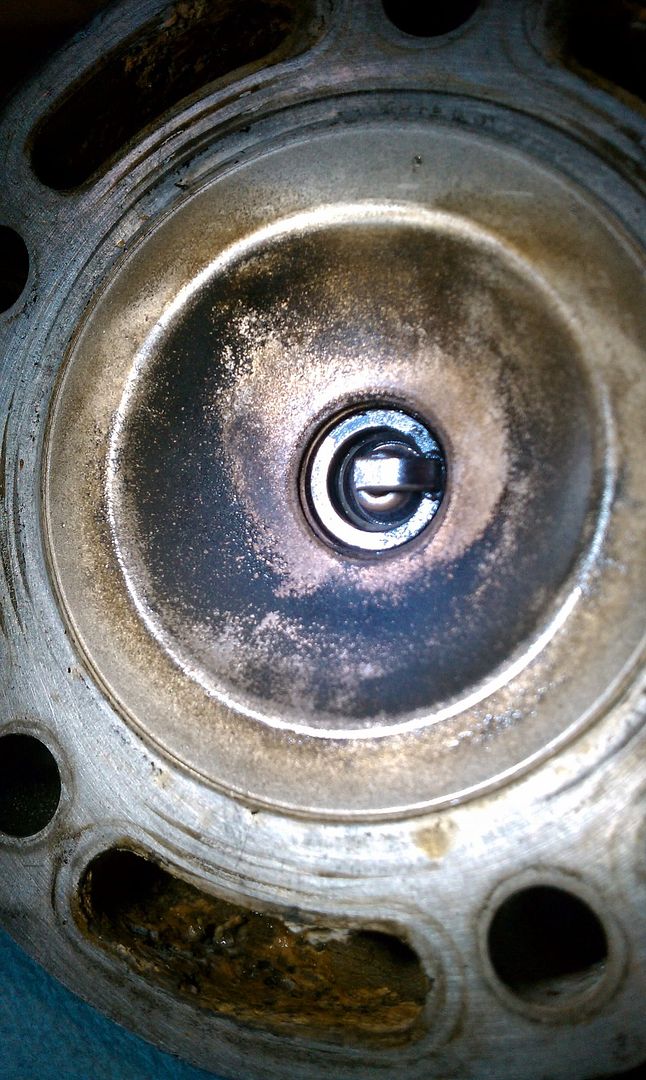
Bottom view of the head
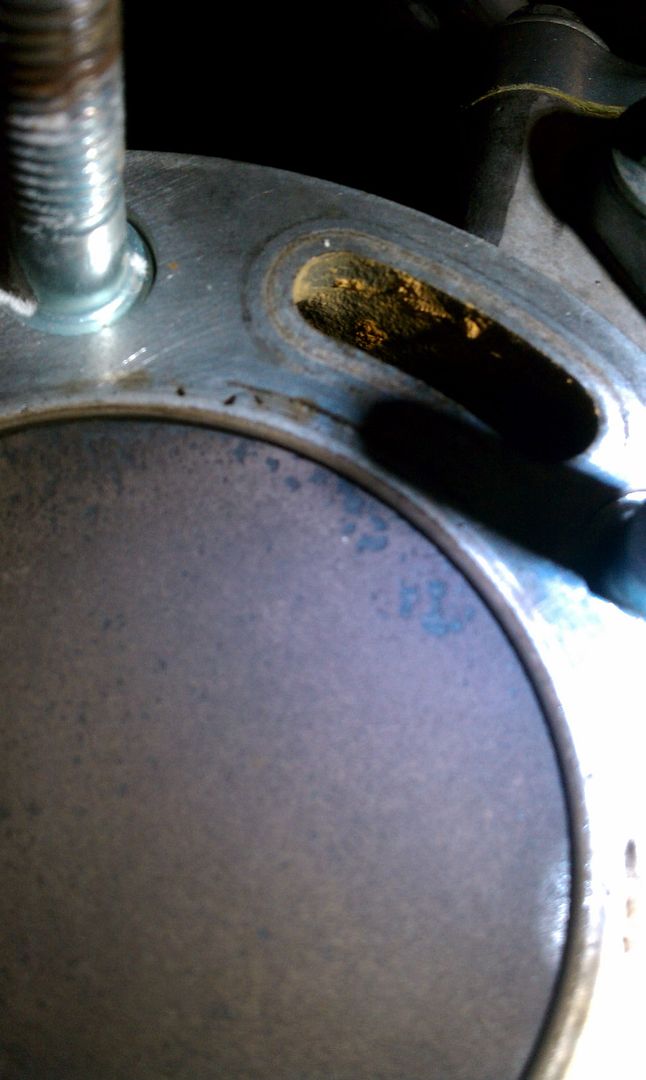
Close up view of piston shows what seems to be a calcium deposit. That could have only come from water (non-distilled) leaking into the combustion chamber.
Same view only zoomed out
Close-up of the head shows a rather clean head. The carbon might have been washed off from water blasting it off. The head looks pretty good over all. The ducts will be cleaned vigorously with mineral-spirits and scotch bright pads.
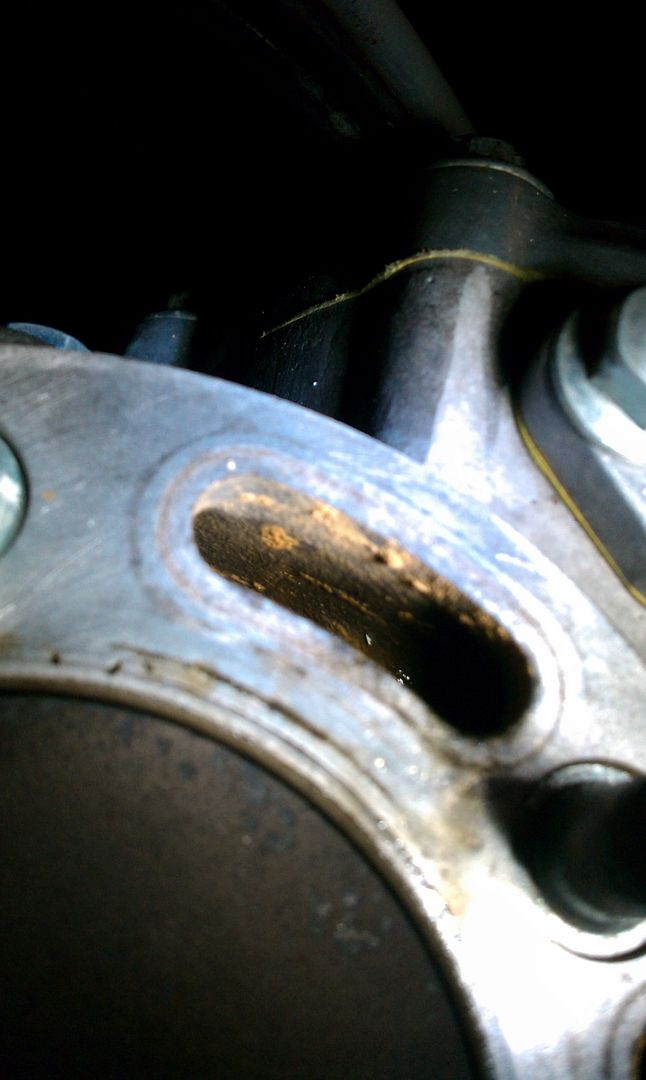
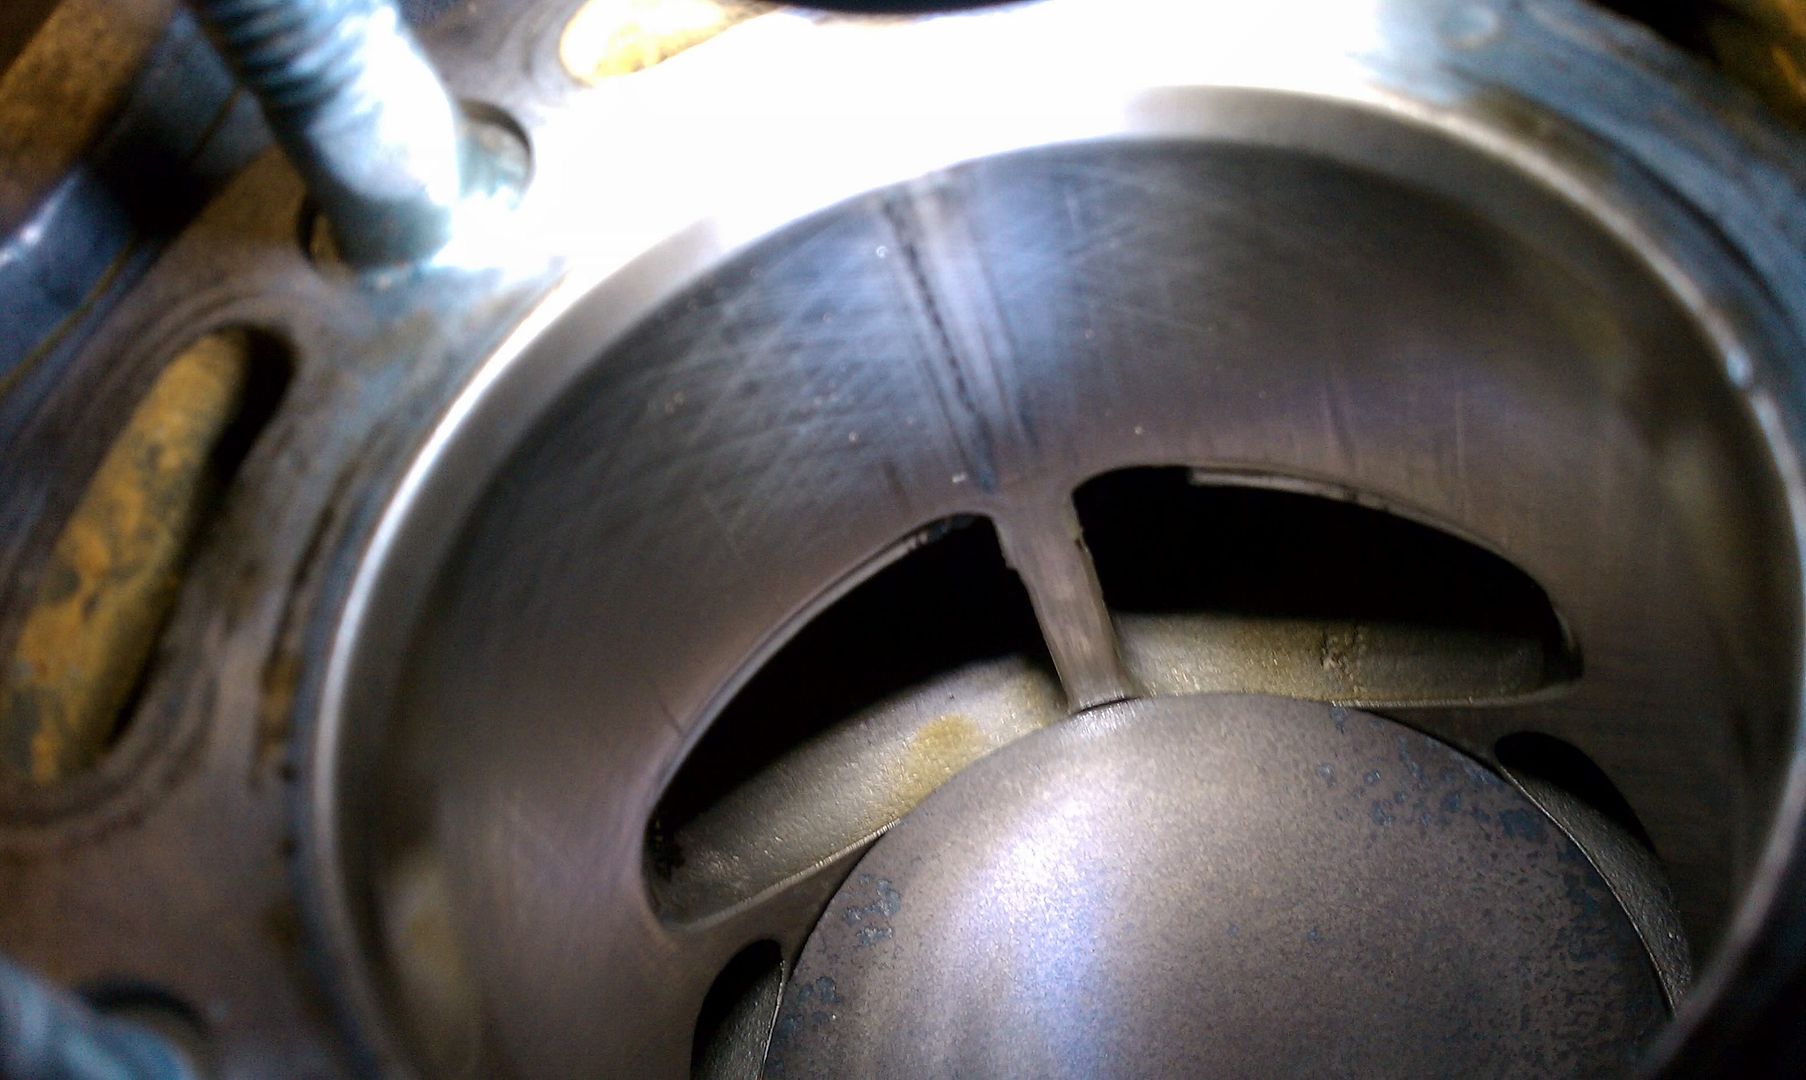
Cooling duct of the cylinder (the part that attaches to the head)
A scrape is visually evident, though I couldn't feel any groove with my finger so it isn't as bad as it looks. In the future I might have this area re-nickled and resurfaced.
So what does all this mean? Well I need to take the head to a friend's shop to check how level and straight the surfaces are. If they are not level enough, I will simply lap them level. For those that don't know what lapping is. It is taking a VERY flat surface like a machined piece of aluminum or a granite block, putting a piece of sand paper (some-what fine grain) on that flat surface, and methodically rubbing/turning the surface you wish to flatten in a figure-8 pattern. This will sand the surfaces back to a very level surface. The head will need to mate flawlessly to the cylinder and the head-gasket.

After that I will clean and re-die the head studs because they seem too dirty to reliably torque the head on to. The cleanliness of these are important because when you tighten something like a head back onto the cylinder you need to have all the bolts apply the same pressure to the head. By each bolt applying the same pressure to the head, you allow for the mating surface to be as flat and even as possible. To accomplish this you use what is known as a torque wrench. The wrench tells you how tightly you are pushing the nut onto the bolt. The problem is that if the bolt you are tightening the nut on-to is rough or dirty, the torque readings will be thrown off. You might actually be torquing the nut to the correct value, but the force that nut is actually applying to the head will be less than you expect.

So that's a rather technical update. I have no videos of me driving like mad or running into bushes.

Sunday, October 3, 2010

Practice day Two

For no reason other than a good laugh I present, The Stig Vs The Business Man


I feel this video is a little harsh of my performance on my second day out, but I did find it enjoyable to watch myself fly off the track a couple of times, so I hope you do too. I am getting a better feel for the kart. But to be quite honest, it is very hard to drive these things well when you don't reliably get power delivered by the sputtering engine, nor braking power from leaking brakes. Even with what would seem to be a night of frustration, I found myself to be the exact opposite mood. I was excited that I was actually having difficulties. While the setup is still far from correct, I know that I have not been fretted nor was I frustrated with a bad night, I simply want to become better. I still hold to the belief that there is nothing more exciting than scaring the crap out of yourself in one of these carts.

Wednesday, September 15, 2010

Quick note about last night


*Kart ran better.

*Brakes are still leaking (made for an interesting night)

*Bought the wrong spark plug, but I increased the gap of the old plug 20/1000's to 30/1000's and that actually made the motor run much stronger

*Still leaking water like a sieve, not sure exactly where it is leaking from.

*Had to take 2 Tylenol this morning for the pain


Victory!


I'll post videos and a good story of why I ran off the track and into the dirt three times. But for now, off to the editing machine!

-S

Bought 3 books that I'll be reading, and I am going to shamelessly advertise them here:

Tune to Win: The art and science of race car development and tuningDrive to Win: The Essential Guide to Race DrivingEngineer to Win (Motorbooks Workshop)

Sunday, September 12, 2010

Interview with Michael and First Repairs/Improvements to the kart

While the repairs of the kart continue I caught this interview on the BBC between David Coulthard and Michael Schumacher.


It is always great to see drivers open up a little bit, but the relationship between these two can be summarized in this clip.


In the interview below Michael discusses briefly his love of racing has little to do with, or even the lack there of, the adrenalin rush of a race or the sensation of the car. His Deutschland heart is set on the precision of the driving-line and holding the car 'at the perfect limit'.


I found it insightful when he said "I'm surprised that you do it for the adrenalin." Michael said to David, who until very recently was a great formula 1 driver [if you didn't gather that from the first video]. Hearing that he approaches racing from much more of a professional "This is my job and I don't get excited" point-of-view was certainly something that struck me as new. Again, the author of this blog, me, honestly doesn't know his ass from a hole in the ground about the history or the opinions or the struggles of race car drivers. But, as a child that hated bumper cars because I couldn't win, I feel safe to now say , "I feel as though I understand you Michael. Race to win and nothing more. Those that give you the middle-finger as you cut them off, just weren't as good as you." Now being able to race by those words will be something I'll have to work vigorously to achieve.


to the repairs on the kart:

It has been enjoyable to finally get 'under the hood' of a vehicle that has no hood, or seat belt as it were.

The 'list' as I sad last post was: Fix the brakes, fix the king pin assembly, change the spark plug.

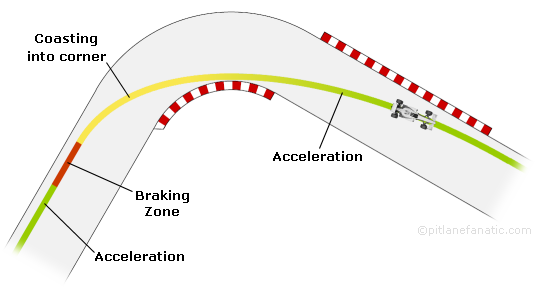
Well the brakes come first. One thing to consider when racing, if all the cars are equal, it is not a safe assumption to think you'll be able to pass someone by out-accelerating them. Indeed most passing happens in the breaking zone before a turn. The best way to get that extra car length on your opponent is by being able to break later than he and still hold the line well enough to then maintain your position. This is what most drivers are referring to when they are talking about driving on the edge of the limits of the car. Breaking late enough to get ahead of your opponent, but not so late that you go too wide and allow the person to pass you again while they maintain a standard path along the track. And not too early as to not be able to gain a usable advantage. In addition you must remember that the person in-front of you is also trying to brake as late as possible as well to maintain as high a speed for as long as possible. This is true in passing, however there are many different approaches when discussing how to run the fastest possible lap. 

I've shamelessly stolen the following diagram from vivaf1.com


http://www.vivaf1.com/blog/?tag=racing-line


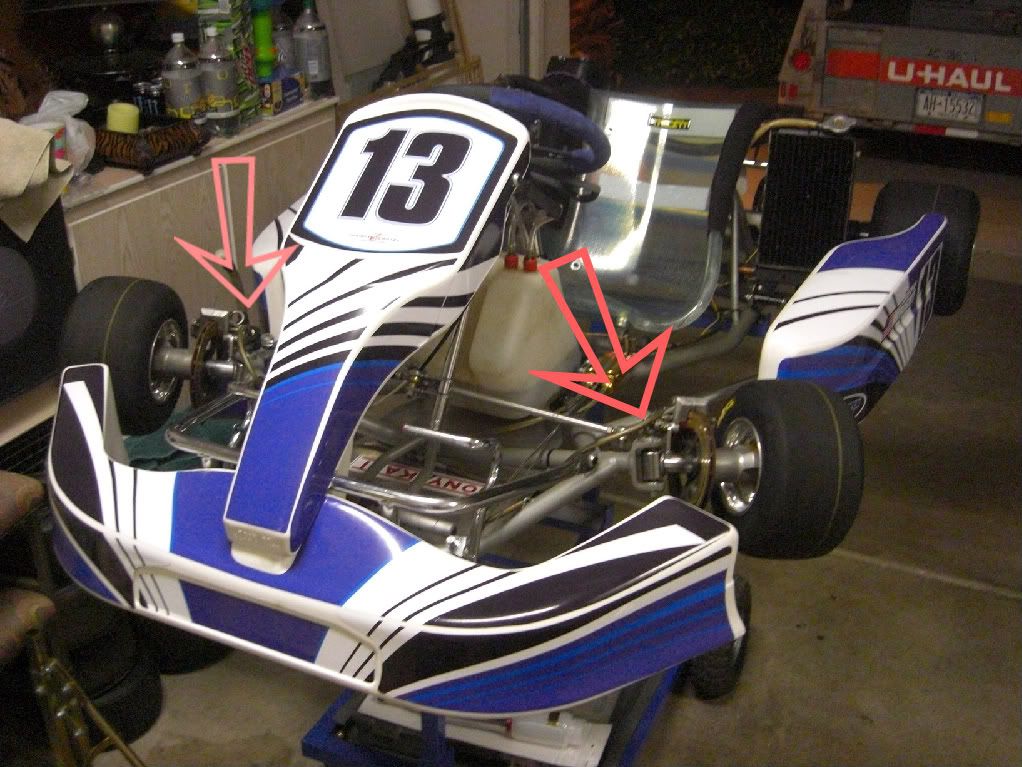
But back to the brakes and king-pin assemblies. (By the way, I am going to try to include the following picture from now on to point at exactly where on the kart I'm talking. So please shout at me if I forget)


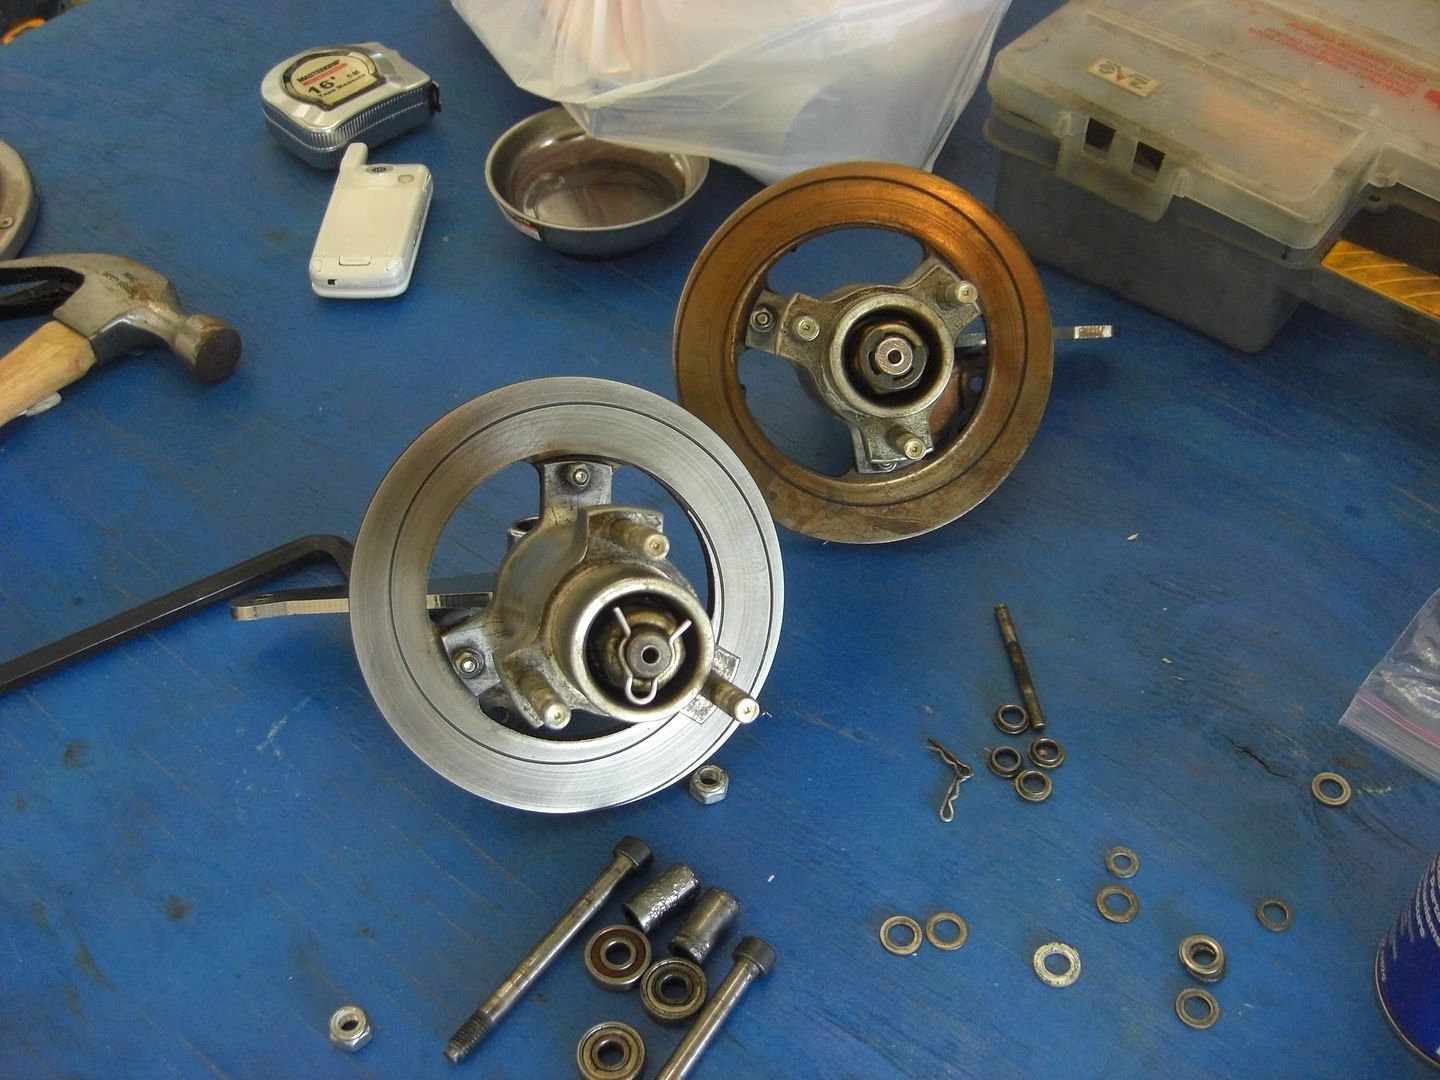
First, the brake rotors need some cleaning. Here is a 'before-and-after cleaning'  picture of the brake rotors with some scotch-bright, WD-40 and some elbow grease.


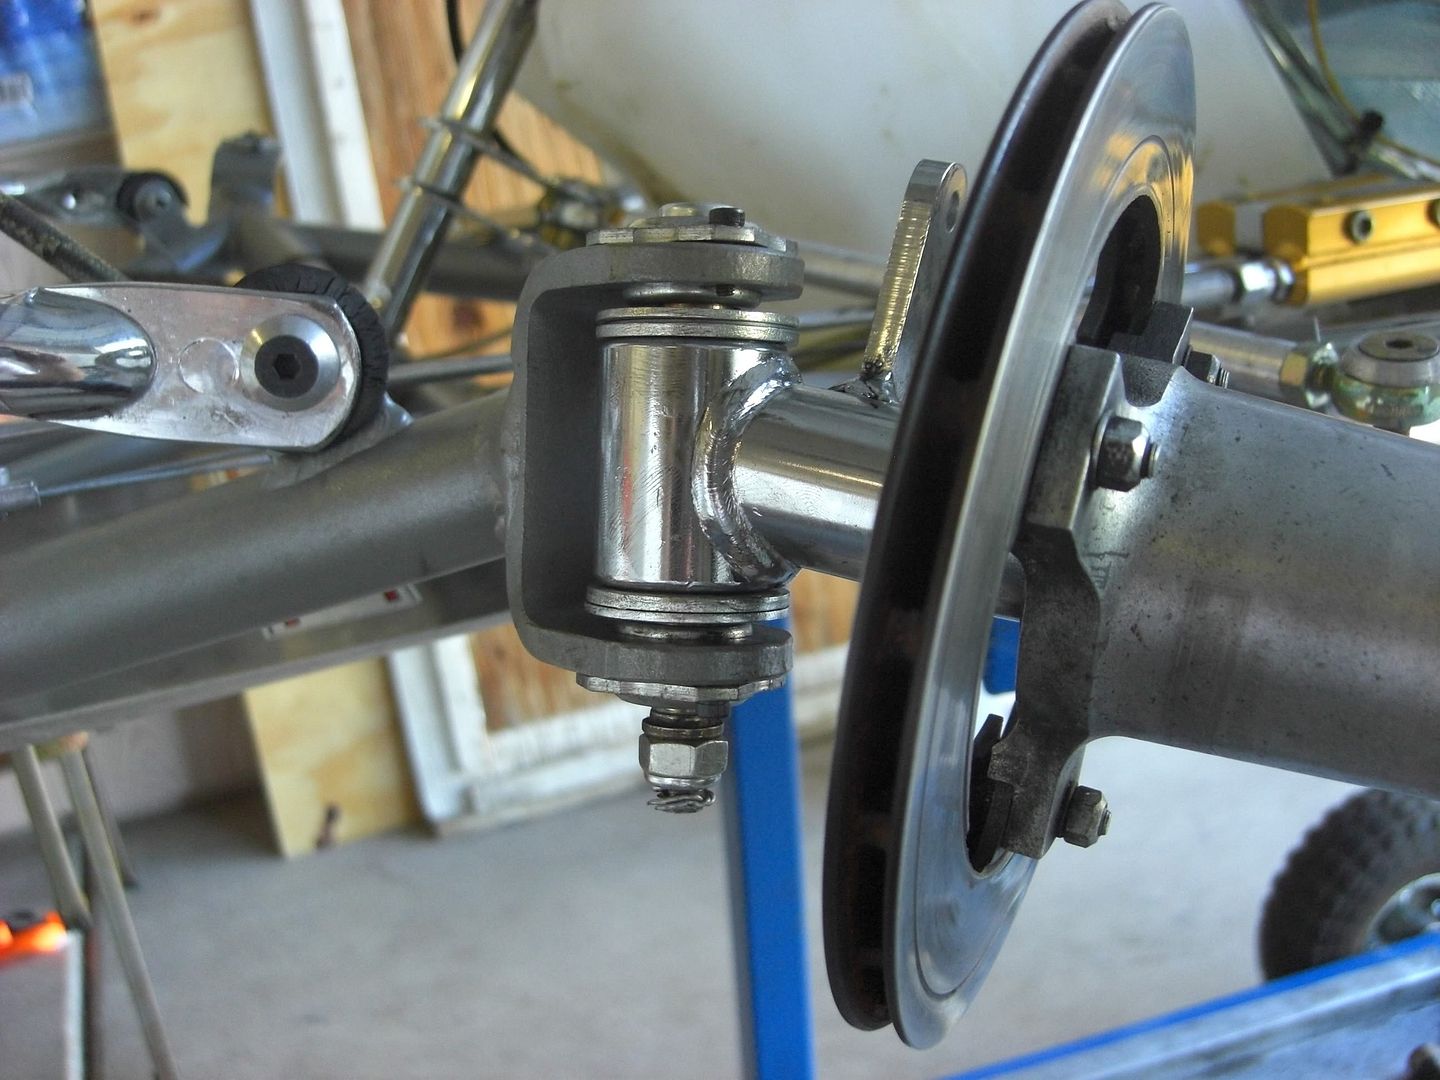
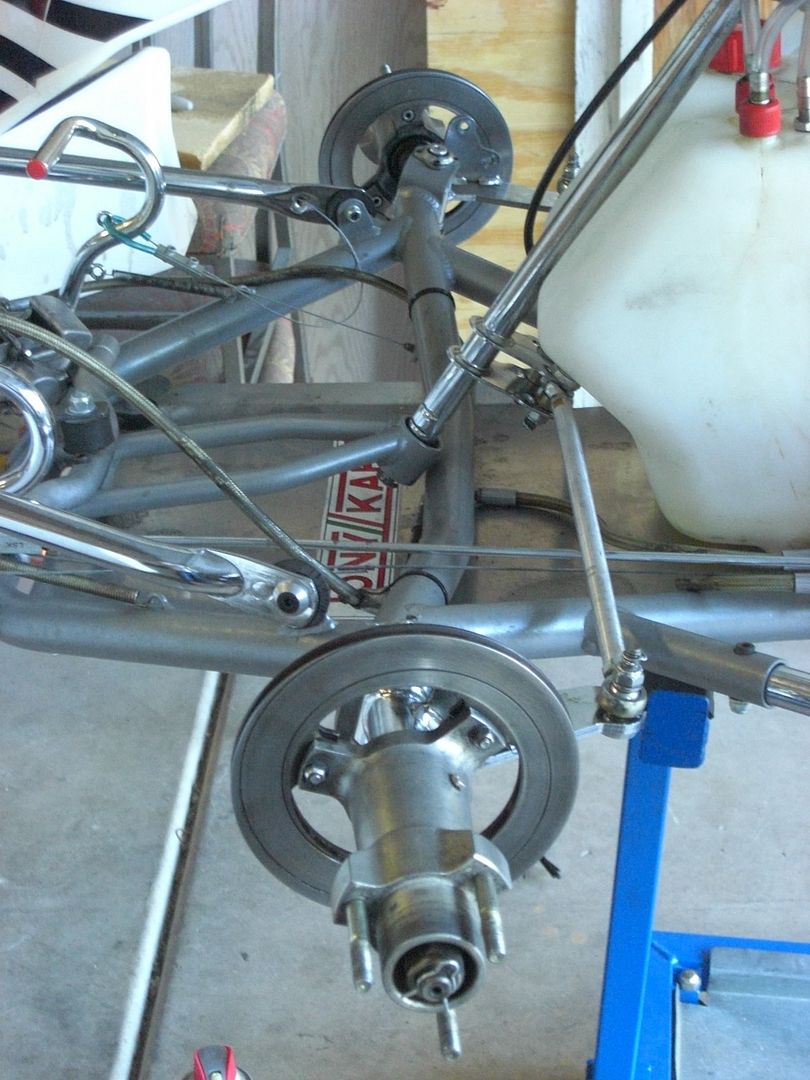
So rust gone I looked to the king pin assemblies. Again the king pin assembly is the group of parts that link the rotors and the spindles, pictured above, to the chassis. With these parts the spindle is allowed to rotate, then subsequently turn the car. Since I took these pictures and wrote this entry, I have rebuilt this assembly again so what is pictured, isn't exactly what is running on the kart now.


With these parts on the king pin assembly, you can modify the ride height of the front of the kart, the caster, the camber, and even a small adjustment to the wheel base. I'll get into what all of these are and how they change the performance in a much later post when I more fully understand their effect myself. i.e. when I've gotten a couple more runs under the belt. So the picture above and on the right, you can see the steering arms attached. You can use those devices as well to change the alignment of the front wheels. Most people have a feeling of what this is, but in racing you don't necessarily want the front wheels parallel.


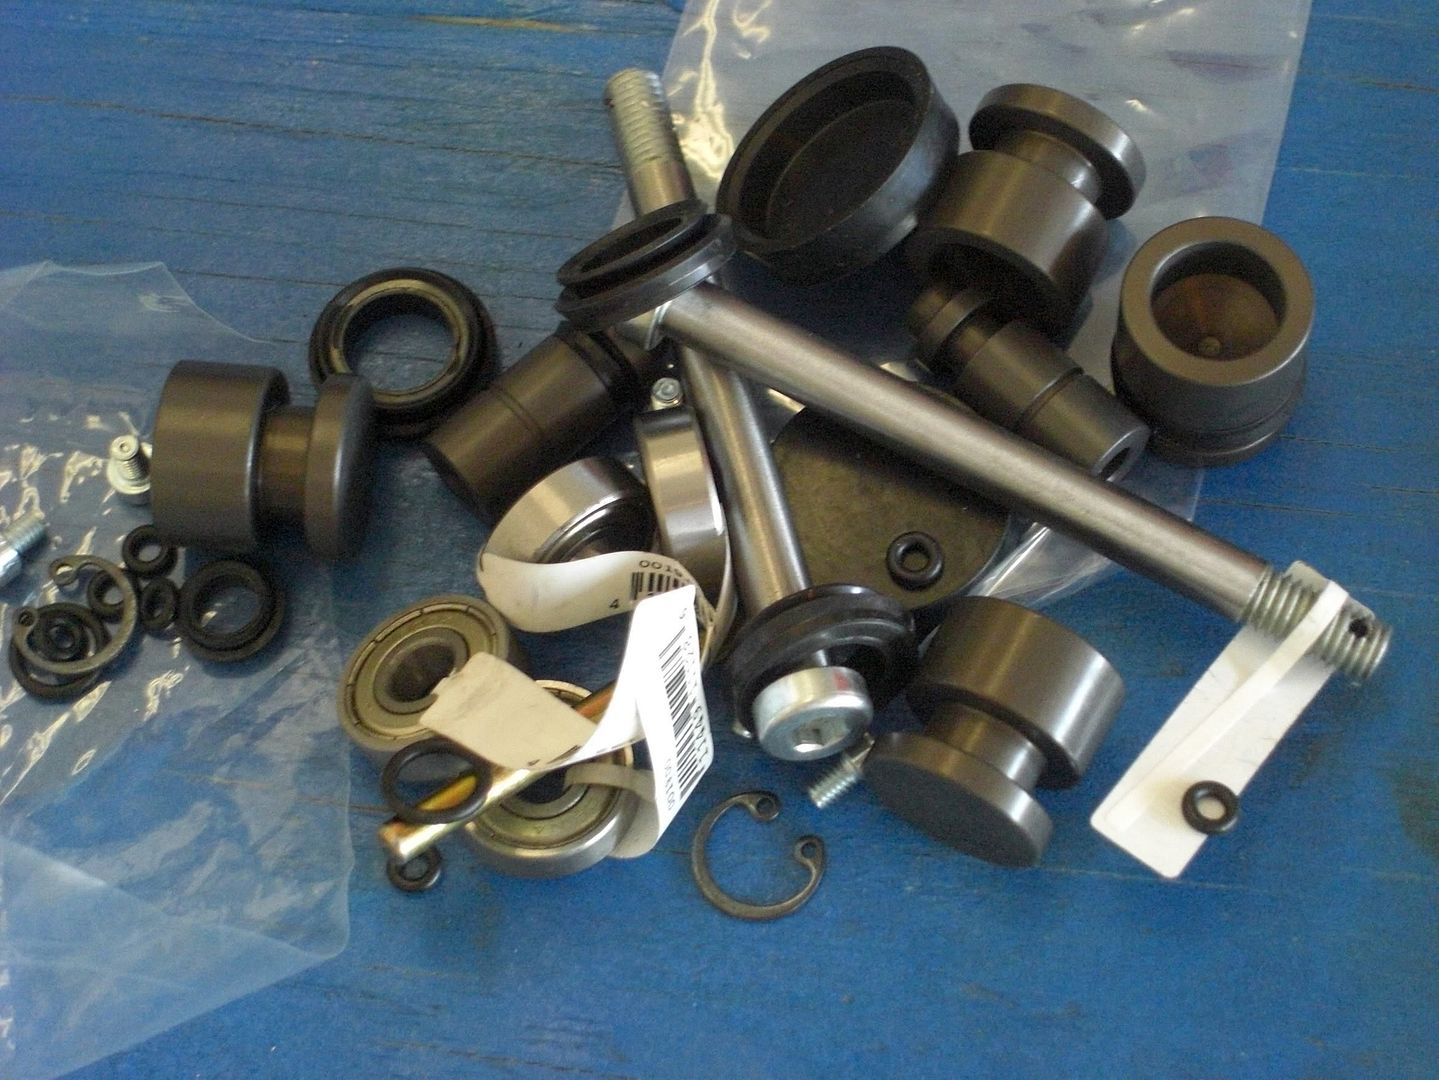
Next came the hard part, rebuilding the brake system. The Tony Kart chassis that I have, while one of the top quality chassis for performance, has a problem with the brakes. They need to be bled every race. I showed the little device to bleed the brakes before, but to help prevent this I decided to upgrade many of the brake parts to newer, less leaky, parts. Here's a picture of a bunch of replacement parts.


So with a new set of cylinders and seals in the master cylinder, new o-rings in the calipers, the brakes might function better and require less bleeding from now on. With that rebuilt, I reinstall the front brake calipers.


So with the brakes cleaned and rebuilt, I moved onto fixing the radiator. 


First I wanted to fix the absolute crap of a radiator cap. The cap is what you think it is. It's the cap on the radiator and it keeps the water in the cooling system. So with a set of pliers and some grunting Ken actually bent the cap around a little bit. So with that fixed I then needed to fix the mounting of the radiator. It seems one of the bolts had just completely fallen out. So the radiator was just swinging 'freely'. In these pictures I had to remove the rear left tire to get access with a wrench and to take a better picture. The threading inside of the hole I wanted to mount to had been almost completely stripped. Taping a new set of threads might be in the future for me. 


I used a zip-tie to hold to mounting arm where it is, and there was just enough threading to hold the bolt in place with some lock-wire.


 In the last video of the first time at the kart track you might have noticed the notes I put a note on the video of needing a new spark-plug. Well upon removing the old plug I noticed a substantial amount of oil caked to the plug which was to be expected with a 2-cycle motor, but also I noticed the gap between the anode and cathode was only about 25-thousands of an inch. I figured such a narrow gap might explain the lack of power on the high end RPMs and the excessive oil might be the cause of the poor low end as well. Either way, a new plug is in and I gapped this plug to 30/1000". (edit: this turned out to be partially true. However I since then changed to a G class spark plug and gapped to 30/1000. That helped a little bit. The true culprit of the power losses was a leaking head-gasket. Easily fixed once the problem was identified.)


 I hope that I'll be able to get out to the track again this week. Get some practice and learn a bit more about this kart.


So until next time,


-S

PS: Practice is on, expect some good videos later in the week. I'd also like to thank my viewers from Canada and the one person from South Africa that reads this. Thank you for checking in.

Tuesday, August 17, 2010

The day of

What a fantastic morning. Weather report says 20% chance of rain and a high of 100F. Indeed what a perfect day to lite the fires and kick the tires. Here's a picture I took while waiting at the red-light right outside my place on the way to work.


The plan is that once I leave work I'll go pick up the readied trailer, stop by one of a couple places to get 110 octane fuel, then be at the track by 6:30. I suspect this will be much like heading to church the night before Christmas as a 6 year-old. You have no idea why it must last so long, and it is the same story you heard last year.


9-hours later


Talking about karting at work did not help the time to pass. I got a couple of "good lucks" from friends and some chatting with my racing buddy Ken wrapped up the end of my work day. Tonight, I was going to be "That awesome guy in the suit". Out of the way Mr Ferrari, I'm faster.

I arrived and hitched up the trailer without a -- hitch. Once on the freeway the entire scenario was starting to seem more real than when I bought the kart and towed it home. I was finally that guy on the way to the track. No spectating tonight for me. I could see the kart atop the trailer in my rear view mirror Actually, that was all I could see in the rear view. As people kept passing me concluded I needed to make a placard for the back on the trailer. On the left side it would say, "This trailer does 55 -- so go around." On the right side it would say, with an arrow pointed up, "But this does 120, so move-it"


After driving to two of my 'locations' to get fuel and still empty handed, I noticed something rather rare in Arizona. Rain. Rain in a dark column. Rain in a dark column amid blue skies directly NW of where I was getting fuel at my 3rd and last hope for where people still sell 110 fuel. What is NW of where I was at that time? The track. God thought it funny to show me a beautiful morning, then piss right on where I was about to go racing. The entire valley was clear skies, but the track was right in the narrow path of what would become a puddle. Luckily the guys at Innovative Karting did still sell fuel. Once I stepped outside again the rain seemed to be moving on, but now the whole of the sky was darkening.


Yet I will not give in hope, nor turn my head in shame, I ventured on to the track and gave my racing buddy a call. He said 'It's on'.


So I arrived at the track and he starts giving my kart a good once over. Since I still have zero experience with setting up a kart, he played in invaluable role in helping me out that evening. He's also not a fan of looking at the camera. So between me only showing a helmet, and he only showing a hat, I guess no one really knows who the hell we are.


The stage was set. It was newbie night so I figured I'd be with newbies. Do 10 year-olds that have been driving for 2 years still count as newbies? I feared not. worse comes to worse I'd rely on my greater top speed.... or something.

In the pictures above you can see a small canister where the steering wheel used to be, that's to bleed the brakes of any air-bubbles. By pushing brake fluid into the master cylinder (where most of the brake fluid sits until you push it with the brake pedal), you can open small holes at the bake calipers (the part that grabs the wheel to slow down) and let air leak out. Once that is complete the brakes will function smoothly.

So all was said and done after about 2 hours of help from Ken. Then, as would be expected with the dead give-away from before. It rained.


But we didn't come here for a boring story, so after about an hour of light rain and moderate winds, the track seemed clear and dry enough and I said "Lets do it"

My trusty camera was of course running, enjoy the show.


The after math


So it turns out I'm not that shitty a driver, it's just that my left wheel had a broken king-pin and that threw everything out of alignment. This pin was likely bent before I'd even bought the kart. But none-the less I'm almost glad for it, because the follow day, every muscle and every joint in my body was sore. So if the kart was functioning at full force, I'd be even worse off physically.

But the ride was still a cacophony of unprecedented physical sensations and fear. Like riding a roller-coaster for the first time, or meditating deep in the mountains, all else faded away from the track. It was me, the karts, and the road. While I did experience fear throughout the entire ride, and accelerations that I could only describe as "uncomfortable" at times; the belief that I knew I would be safe brought a calm I haven't felt for a very long time.

Thus after an excellent first time out, it was now time to inspect, repair, and learn all about the kart. 


Below are the broken parts.


The king pin is the part that allows you to turn each front wheel. That was bent (the one on the right is bent just above the threading only about 5 degrees) and did not allow the wheel to rest level on the pavement. The broken bearing.... that shouldn't look like that and it actually fell apart in my hand.


So next episode will likely be about repairing the steering, the brakes, and the motor. Maybe even give the kart a small bath of love.


So until next time,


-S